
Hello everyone,
In this review i'm gonna present you one of the latest Home Security Systems from Aukey E-Business
It is the MVPower 4-Channel 700 TVL Home Security System and let's get to it

What's in the Box
The System comes in two large packages, one of them contains the main console and the other one contains the cameras
Opening the first box we get

The main console is black, it's made from aluminium and has a somewhat rough but nice industrial feel on the hand


If we flip it upside down we see the rubber pads, more vetilation grills and a sticker with the device's model, input rating, HDD capacity and PAL indication

In this review i'm gonna present you one of the latest Home Security Systems from Aukey E-Business
It is the MVPower 4-Channel 700 TVL Home Security System and let's get to it

What's in the Box
The System comes in two large packages, one of them contains the main console and the other one contains the cameras
Opening the first box we get
- A User Manual
- 4 Screws used to mount a Hard Drive
- A Warranty Card
- The Console itself
- The IR Remote
- The A/C Adapter rated at 12V 2A
- A USB Mouse
The second box includes
- An installation instructions leaflet
- 4 700 TVL Cameras with their wall bases
- The connection cables for each camera
- A Power Cable
- An A/C Adapter rated at 12V 2A

Looks & Ports

On the top we have some ventilation grills and nothing more

On the left and right sides we have some more ventilation holes and grills and 2 screws which hold the top cover in place


The front face is made from plastic and and has all the operation LEDS and the MVPower logo

All the ports are on the back side and they include
- 4 x Video Inputs
- 1 x Video Output
- 1 x HDMI Output
- 1 x Audio Input
- 1 x Audio Output
- 1 x VGA Port
- 1 x Ethernet Port
- 2 x USB 2.0 Ports
- Rs485 Connection
- D/C Input rated at 12V
- Power On/Off Switch


The 4 cameras have a sturdy construction and they're white and made of thick metal which is good, the part which hold the lens is made from black plastic and it contains 24 IR leds which help boosting the visibility in dark areas


Set Up Instructions
Setting up this surveillance system is super easy and it doesn't take a lot of time. The most difficult part is where you want to put your cameras and how you will manage to hide the cables after you're done

I'm gonna show you a basic installation tutorial to help you set up your own CCTV home surveillance system yourselves

You can always try to use the included instructions of course but i suggest you to watch the rest of this video if you want to set up your system easy, fast and painless

For starters i will connect the camera cables to the main console, notice that each cable with a yellow end has a label on it indicating wether you have to connect it on the camera or on the the DVR console

So one yellow end goes to the camera and the other yellow end goes to the Video Input 1
As for the red ends, one of them also goes to the camera and the other end goes to the second A/C Adapter after we have connected the extension cable


All we have to do now is connect the main console to our monitor via a VGA or an HDMI able and we're good to go, that was easy wasn't it?

In the package there is a mouse and an IR remote. I suggest you use the mouse to control the system and the IR remote to view and control your recorded videos

Operation and Settings
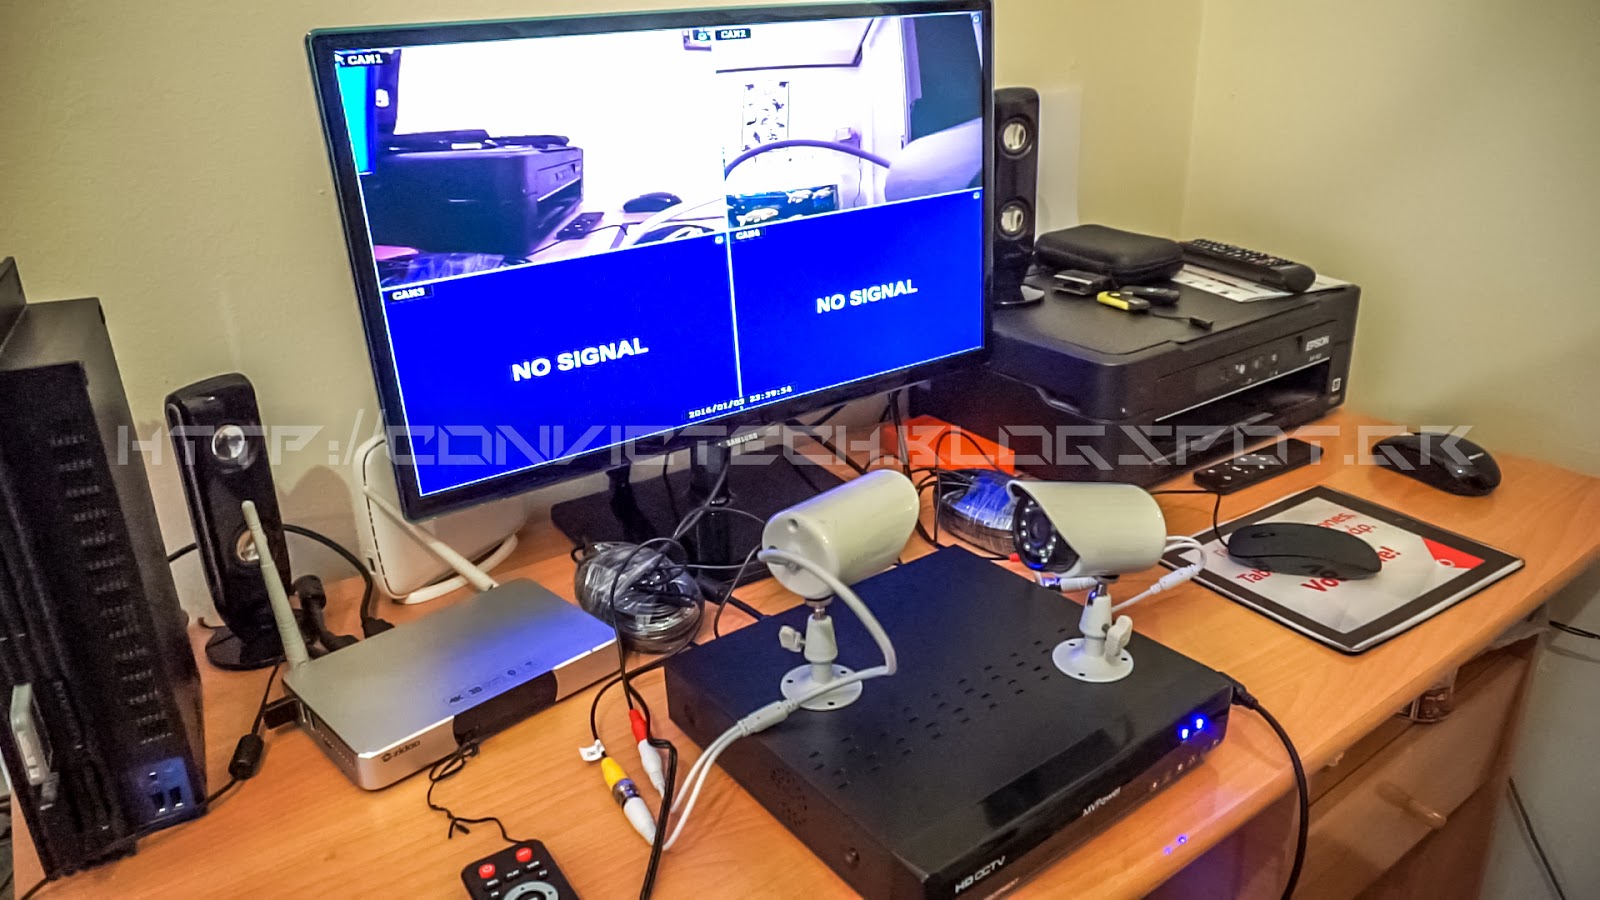
When you first power on the device and have everything set up correctly, you see the streams from your cameras and depending on the number of your cameras you have the same number of windows showing the footage

If you double click on one of the windows it turns to a fullscreen or you can either choose from the menu which one you would like to watch

In the setup menu we have


Set Up Instructions
Setting up this surveillance system is super easy and it doesn't take a lot of time. The most difficult part is where you want to put your cameras and how you will manage to hide the cables after you're done

I'm gonna show you a basic installation tutorial to help you set up your own CCTV home surveillance system yourselves

You can always try to use the included instructions of course but i suggest you to watch the rest of this video if you want to set up your system easy, fast and painless

For starters i will connect the camera cables to the main console, notice that each cable with a yellow end has a label on it indicating wether you have to connect it on the camera or on the the DVR console

So one yellow end goes to the camera and the other yellow end goes to the Video Input 1
As for the red ends, one of them also goes to the camera and the other end goes to the second A/C Adapter after we have connected the extension cable


All we have to do now is connect the main console to our monitor via a VGA or an HDMI able and we're good to go, that was easy wasn't it?
In the package there is a mouse and an IR remote. I suggest you use the mouse to control the system and the IR remote to view and control your recorded videos

Operation and Settings
When you first power on the device and have everything set up correctly, you see the streams from your cameras and depending on the number of your cameras you have the same number of windows showing the footage

If you double click on one of the windows it turns to a fullscreen or you can either choose from the menu which one you would like to watch

In the setup menu we have
- Video Playback, where we can watch our recorded videos based on Manual, Time, Motion and Sensor
- Video Backup, where we can Back Up our recorded videos on a USB stick or an External HDD and watch them again
- System Tools, where we can set up the Users, HDD, do System Updates and restore the system to it's factory settings
- System Info, where we can see our HDD info, System Version and System Logs


We also have the Settings Menu which has 8 tabs, so we have
- General Setup, where we can set time & date, Language, Video Mode to PAL or NTSC and more
- Encode Setup, where we can change the Channel, Encoding Mode and Format, Quality. Stream, Bitrate Mode and Framerate
- Record Setup, where we can program a recording schedule
- Network Setup, where we can set up our network, find out our ip address, port and more
- Screen Setup, where we can change screen resolution and adjust the colours
- Video Detection where we can set up our system to start recording when it detects movement and notify you by an Alarm, Buzzer or e-mail
- PTZ Setup
- Sensor Setup


A great feature is that if the cameras are in a dark area they switch to night vision mode

Another great feature is that you can remotely watch your cameras from your Android phone and tablet as well as your iphone and ipad
To do that you have to download the Eseenet+ application from the Google Play Store or the Apple App Store set up your ip and port and you're good to go

Another great feature is that you can remotely watch your cameras from your Android phone and tablet as well as your iphone and ipad
To do that you have to download the Eseenet+ application from the Google Play Store or the Apple App Store set up your ip and port and you're good to go


Conclusion
The MVPower HD CCTV Camera Security System is a very important and necessary tool for someone to keep an eye on his property and belongings even from far away with the ability to be notified with an e-mail if let's say a break in occurs in his home or private property
Pros
- Price
- Connect up to 4 cameras
- Super long camera cables
- Good visibility in the dark
- Easy to set up
Cons
- Construction could be better but it's ok
- Not very sturdy camera bases
I hope you liked my review and as always for more, unboxings, reviews and tutorials subscribe share and follow me
Watch my Video Review
I hope you liked my review, stay tuned for more and as always for more unboxings, reviews and tutorials subscribe, share and follow me:
No comments:
Post a Comment